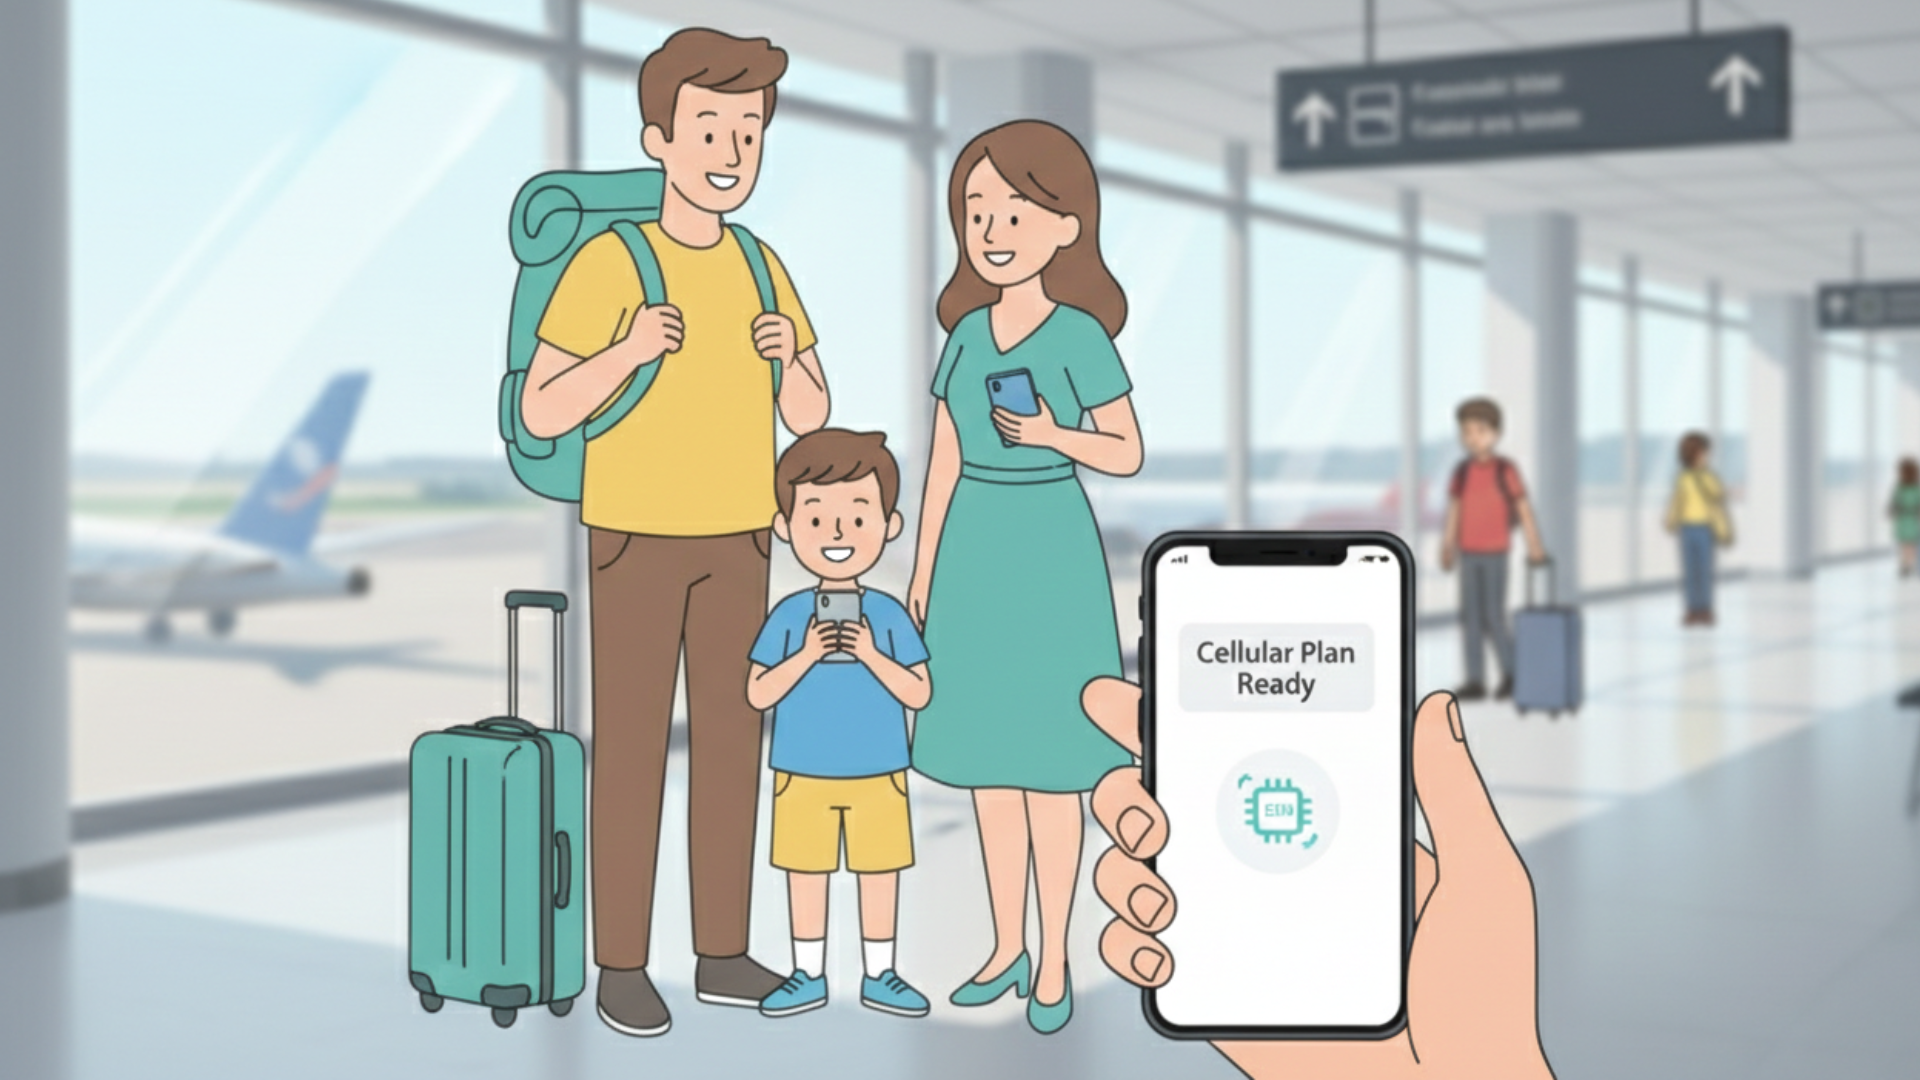
The Complete eSIM Setup Guide for Families: From Purchase to Landing
You’ve purchased your family’s eSIM plan. The QR codes are sitting in your inbox. Your flight leaves tomorrow. Now what?
Setting up eSIMs for your whole family might sound intimidating, but it’s actually simpler than you think - as long as you understand one critical distinction: installing an eSIM is NOT the same as activating it.
This guide walks you through every step, from the moment you receive your QR codes to the moment you land and hear your teenager ask, “Is my phone working yet?”
The One Golden Rule: Install Before You Leave, Activate When You Land
Let’s start with the most important concept in eSIM setup:
Installation = Adding the eSIM profile to your phone (do this at home, on WiFi, before your trip)
Activation = Turning on the eSIM to start using data (do this when you arrive at your destination)
Think of installation like installing an app on your phone. Just because you installed Netflix doesn’t mean it’s playing a movie right now. Activation is like pressing “play.”
Why This Matters
If you activate your eSIM too early:
- Your data plan might start immediately - though this depends on whether data roaming is enabled and if the plan is valid for your current location
- You could waste days of validity sitting on your couch if activation triggers the countdown
- Some plans have 7-day or 30-day validity windows that might start counting down the moment you activate
If you wait to install until you land:
- You’ll be fumbling with QR codes in a crowded airport
- Kids will be impatient and asking every 30 seconds if it’s working yet
- Airport WiFi might be slow or require login, making installation harder
- You’ll feel rushed and stressed when you should be enjoying your arrival
The smart approach: Install at home, activate on arrival.
Step 1: Check Device Compatibility (Before Purchase)
Before you purchase your eSIM plan, make sure every family member’s device actually supports eSIM.
iPhone Compatibility
eSIM works on:
- iPhone 14 and newer (all models, including standard, Plus, Pro, Pro Max)
- iPhone 13 and 13 mini, 13 Pro, 13 Pro Max
- iPhone 12 and 12 mini, 12 Pro, 12 Pro Max
- iPhone 11 and 11 Pro, 11 Pro Max
- iPhone XS, XS Max, XR
- iPhone SE (2020 and newer)
Important for US families: iPhones purchased in the US after iPhone 14 do not have a physical SIM slot. They’re eSIM-only, which makes this even easier.
Android Compatibility
Most Android phones from 2019 onward support eSIM, including:
- Google Pixel 3 and newer
- Samsung Galaxy S20 and newer (S20, S21, S22, S23, S24 series)
- Samsung Galaxy Z Fold/Flip 3 and newer
- Motorola Razr (2019 and newer)
- Huawei P40 and newer (in markets where available)
How to check on Android:
- Open Settings
- Go to Connections or Network & Internet
- Look for SIM card manager or Mobile network
- If you see an option to “Add eSIM” or “Download SIM,” you’re good to go
iPads and Tablets
Many iPads support eSIM (cellular models only):
- iPad Pro (3rd generation and newer)
- iPad Air (3rd generation and newer)
- iPad (7th generation and newer)
- iPad mini (5th generation and newer)
If your kids have cellular-enabled tablets, they can get their own eSIM with customized data, or connect via mobile hotspot from a parent’s phone.
Device Not Compatible?
Don’t panic. You have a few options:
- Use mobile hotspot from a compatible device (more on this later)
- Rent a portable WiFi device for that specific family member
- Purchase a physical SIM card locally (old school, but it works)
Step 2: Receive and Organize Your QR Codes (1-2 Days Before Travel)
When you purchase a family eSIM plan from Tribies, you’ll receive:
- One QR code per device (sent via email)
- Installation instructions
- Account login details for the web dashboard
- Customer support contact information
Pro tip for parents: Create a dedicated folder in your email called “Travel - eSIM Codes” and save all QR code emails there. You’ll thank yourself later when you’re trying to help your spouse troubleshoot at 6 AM on departure day.
How to Use Your QR Codes
You have two options for installing your eSIM:
Option 1: Scan the QR code (easiest):
- Open the QR code email on another device (laptop, tablet, another family member’s phone)
- Use your phone’s camera to scan it during installation
- Quick and simple
Option 2: Manual entry:
- If you need to install the eSIM on the same device where you received the email, use manual entry instead
- The email will include an activation code (alphanumeric string)
- Enter this code manually during the installation process
Important: Each QR code is one-time use. Once you’ve successfully installed the eSIM profile on your device, you’re all set - you won’t need the QR code again.
Step 3: Install eSIMs at Home (1 Day Before Travel)
This is where you actually add the eSIM profiles to everyone’s phones. Do this together as a family, in your living room, on your home WiFi. Make it a pre-trip ritual.
For iPhones (iOS)
Here’s the exact process:
- Connect to WiFi - Make sure you’re on a stable WiFi network
- Open Settings → Cellular (or Mobile Data in some regions)
- Tap “Add eSIM” or “Add Cellular Plan”
- Choose “Use QR Code”
- Scan the QR code - Point your camera at the printed code or screenshot
- Label the plan - Name it something clear like “Europe Trip” or “Japan Family Plan”
- Choose whether to use this line:
- For calls/texts: Keep your home carrier as default
- For data: Select the eSIM (but don’t turn it on yet!)
- Turn off the eSIM line - This is critical! Go back to Settings → Cellular → tap the new eSIM line → toggle it OFF
Screenshot reference: The iPhone installation screen shows your existing carrier (e.g., Verizon) and the newly added eSIM line. The eSIM should show as “Off” until you’re ready to activate.
For Android (Samsung Galaxy Example)
The process varies slightly by manufacturer, but here’s the general flow:
- Connect to WiFi
- Open Settings → Connections
- Tap “SIM card manager” or “SIM manager”
- Tap “Add eSIM” or “Add mobile plan”
- Select “Scan QR code”
- Scan your QR code from the email or printout
- Confirm the installation - Tap “Add” when prompted
- Name the profile - E.g., “Family Europe eSIM”
- Keep it turned off - Don’t activate mobile data on this profile yet
Screenshot reference: Android shows two SIM cards in your SIM manager - your primary physical SIM and the new eSIM. Make sure the eSIM is toggled off for now.
Troubleshooting Installation Issues
QR code won’t scan:
- Clean your camera lens
- Adjust lighting (too bright or too dark affects scanning)
- Display the QR code on a different device (laptop, tablet, another phone)
- Use manual entry instead: Choose “Enter Details Manually” and type the activation code from your email
“This code has already been used”:
- QR codes are typically single-use per device
- If you scanned it by accident, contact your provider’s support to reset the code
Installation fails midway:
- Check your WiFi connection
- Restart your phone and try again
- Make sure you’re running the latest iOS/Android version
Step 4: Test Installation Success (Still at Home)
Before you leave for the airport, verify that installation worked:
- Go to Settings → Cellular/Mobile Networks
- You should see two lines: Your primary carrier and the new eSIM
- The eSIM should be labeled but turned OFF
- The primary line should still be active for calls, texts, and data
Repeat this check for every family member’s device. If everyone sees their eSIM profile listed but turned off, you’re ready for travel.
Step 5: Pack Smart and Prepare for Activation
Before you head to the airport, make sure you have:
- ✅ All devices with eSIMs successfully installed
- ✅ Login credentials for your provider’s web dashboard
- ✅ Customer support contact info saved in your phone
- ✅ Portable chargers/power banks (critical for activation at the airport)
Access your account online: With Tribies, you can manage everything through the web dashboard:
- Monitor data usage across all family devices
- Add top-ups if you run low
- See which family member is using the most data
- Get support and troubleshooting help
Bookmark the web dashboard URL before you leave home for easy access.
Step 6: The Flight (Keep eSIM Off)
During your flight:
- Keep the eSIM turned OFF
- Keep your phone in Airplane Mode as usual
- Your installed eSIM is dormant - no data is being used, no validity period is counting down
- This is a good time to review the activation steps (see below)
If your kids are asking, “When do we turn it on?” - tell them: “When we land and walk into the terminal.”
Step 7: Activation at Your Destination (The Exciting Part!)
You’ve landed. The plane has taxied to the gate. The seatbelt sign is off. NOW is the time to activate.
Part 1: Turn On Data Roaming (Critical First Step)
On iPhone:
- Go to Settings → Cellular → Cellular Data Options
- Turn Data Roaming ON
- Make sure your eSIM is selected as the default data line
On Android:
- Go to Settings → Network & Internet (or “Connections” on Samsung) → SIMs
- Select your eSIM
- Turn Data Roaming ON
- Ensure your eSIM is selected as the active data SIM
Important: Turn OFF data roaming on your primary SIM to avoid roaming charges from your home carrier.
Part 2: Turn On the eSIM
On iPhone:
- Open Settings → Cellular
- Tap the eSIM line (e.g., “Europe Trip”)
- Toggle “Turn On This Line” to ON
- Tap Cellular Data → Select the eSIM as your data line
- Keep “Allow Cellular Data Switching” turned OFF (to avoid accidentally using your home carrier)
On Android:
- Open Settings → Connections → SIM card manager
- Tap the eSIM profile
- Toggle Mobile data to ON
- Select this SIM for Mobile data
Wait for Connection (This Is Where Kids Get Impatient)
After activation:
- Your phone will search for a network (typically takes a minute or two, but can take longer)
- You’ll see the carrier name appear at the top (e.g., “Vodafone,” “Orange,” “T-Mobile”)
- Signal bars will appear
- Data should start flowing
The classic kid question: “Is it working yet?”
Your answer: “Give it a couple of minutes. If you see bars at the top and the carrier name appears, you’re good to go.”
Test Connectivity
Open a browser or messaging app and try:
- Loading Google.com or any website
- Sending a message on WhatsApp or iMessage
- Checking Google Maps for your current location
If all three work, congratulations - your family is connected!
What If It’s Not Working?
Don’t panic. Try these steps in order:
1. Toggle Airplane Mode:
- Turn Airplane Mode ON, wait 10 seconds, turn it OFF
- This forces your phone to reconnect to the network
2. Restart your phone:
- Power off completely, wait 10 seconds, power back on
- Often fixes stubborn connection issues
3. Check data roaming settings:
- On iPhone: Settings → Cellular → Cellular Data Options → Data Roaming should be ON
- On Android: Settings → Connections → Mobile networks → Data roaming should be ON
- (Yes, even though it’s an eSIM, some phones treat it as “roaming”)
4. Manually select a network:
- On iPhone: Settings → Cellular → Network Selection → Turn off Automatic → Choose a network from the list
- On Android: Settings → Connections → Mobile networks → Network operators → Select manually
5. Contact support:
- Use airport WiFi to reach your provider’s support team
- They can check if your plan is activated correctly on their end
- Most good providers offer 24/7 support via chat
Common Mistakes and How to Avoid Them
Mistake 1: Activating Too Early
The scenario: You install the eSIM at home and immediately turn it on to “test” if it works.
The problem: Many eSIM plans start their validity period the moment they connect to a network. Activating at home means your 7-day plan is now counting down while you’re still packing.
The fix: Install at home, but keep it turned OFF until you land.
Mistake 2: Wrong Data Settings
The scenario: You activate the eSIM, but your phone is still using your home carrier for data (and racking up roaming charges).
The problem: You didn’t switch your “primary data line” to the eSIM.
The fix: Settings → Cellular (iPhone) or Mobile Networks (Android) → Select your eSIM as the primary data line. Turn off “Allow Cellular Data Switching” to prevent automatic switching back to your home carrier.
Mistake 3: Forgetting to Enable Data Roaming
The scenario: eSIM is on, but no data is flowing.
The problem: Data roaming is turned off in settings.
The fix: You need Data Roaming turned ON for eSIMs to work. This won’t incur charges because you’re using the eSIM plan, not your home carrier. Turn OFF data roaming on your primary SIM to be safe.
Mistake 4: Installing on the Wrong Device
The scenario: You accidentally scan your spouse’s QR code on your phone, or vice versa.
The problem: Each QR code is device-specific. Once used, it can’t be used again.
The fix: Make sure each family member uses their own QR code from the email. Double-check the email recipient or device name listed in the email before scanning.
Special Scenarios
What If We’re a Family of 5 with Different Devices?
No problem. Here’s how Tribies (and similar family-focused providers) handle multi-device setups:
- Primary account holder (usually one parent) manages the plan
- Individual eSIMs for each family member with customized data amounts
- Individual QR codes for each device
- Centralized dashboard to see who’s using what
Installation process is identical for each device - just make sure each person scans their own QR code.
What About Tablets and Smartwatches?
iPads: Install eSIM the same way as iPhones (Settings → Cellular → Add Cellular Plan)
Apple Watches: Some models support standalone eSIM, but most share the iPhone’s connection. Check with your provider.
Android tablets: Same process as Android phones (if they support eSIM)
Using Mobile Hotspot as a Backup
If one family member’s device doesn’t support eSIM:
- Install the eSIM on a compatible phone (e.g., parent’s phone)
- Enable Personal Hotspot or Mobile Hotspot
- Connect the non-eSIM device to the hotspot via WiFi
- The connected device will draw data from the eSIM plan
Downside: Hotspot drains battery quickly, so bring a portable charger.
The “Is My Phone Working?” Checklist
Your teenager asks for the fifth time: “Is my phone actually working?”
Here’s a simple checklist to run through together:
✅ Signal bars at the top of the screen (3-5 bars is good) ✅ Carrier name displayed (e.g., “Vodafone,” “Orange,” not your home carrier) ✅ LTE, 4G, or 5G icon next to the signal bars ✅ Can load a website (Google, Instagram, anything) ✅ WhatsApp messages send (if you use it) ✅ Google Maps shows current location (the ultimate test)
If all five are true: “Yes, your phone is working. You’re connected.”
Family Data Management Tips
Once everyone is connected, managing data becomes a team effort.
Automatic Low-Data Notifications
With Tribies, you’ll receive email notifications when your data is running low, so you’ll know when it’s time to top up. No need to constantly check - we’ll alert you automatically.
Daily Check-Ins
At breakfast or dinner, check the web dashboard together:
- “We’ve used 40% of our data. We’re doing great!”
- “Emma’s tablet has used the most because of YouTube - let’s download videos on WiFi instead.”
This turns data management into a shared responsibility, not a parent-only job.
WiFi First, Data Second
Teach everyone the golden rule:
- Hotels, cafes, restaurants = use WiFi
- Walking, driving, sightseeing = use mobile data
- Video streaming = WiFi only (or downloaded offline)
Download Offline Content
Before the trip:
- Google Maps: Download offline maps of each city
- Netflix/Disney+: Download shows and movies for kids
- Spotify: Create offline playlists
- Translation apps: Download language packs
This reduces data usage significantly.
Post-Trip: What Happens to the eSIM?
When you return home:
- Turn off the eSIM - Settings → Cellular → eSIM line → Turn Off
- Switch back to your home carrier for data
- Keep the eSIM profile installed - You might be able to reuse it (check with provider)
- Delete if needed - Settings → Cellular → tap eSIM → Remove Cellular Plan
Some eSIM providers let you keep the profile installed and reactivate it on future trips (with a new top-up). Others require you to delete and reinstall for each trip. Check your provider’s policy.
One Philosophy: One Family, One Account, One Experience
At Tribies, we believe family travel connectivity should be simple. That’s why we focus on the “One” philosophy:
- One account for the whole family (not four separate logins)
- Individual eSIMs with customized data for each person (no forced identical plans)
- One web dashboard to manage everything (check usage, add top-ups, get support)
Setting up eSIMs doesn’t have to be complicated. With the right approach - install at home, activate on arrival - your family can be connected within minutes of landing.
No stress. No confusion. No kids asking “Is it working yet?” for an hour straight.
Ready to Get Started?
If you’re planning a family trip and want a hassle-free eSIM experience, we’re here to help.
Tell us about your trip - We’ll recommend the perfect plan for your family’s specific needs (destinations, duration, number of devices).
Learn how Tribies works - See how our data-sharing approach saves families 25-30% compared to individual plans.
Need help now? Reach out via WhatsApp or email [email protected] - we’re here to answer questions and guide you through setup.
Travel smarter. Stay connected. Share the experience.